


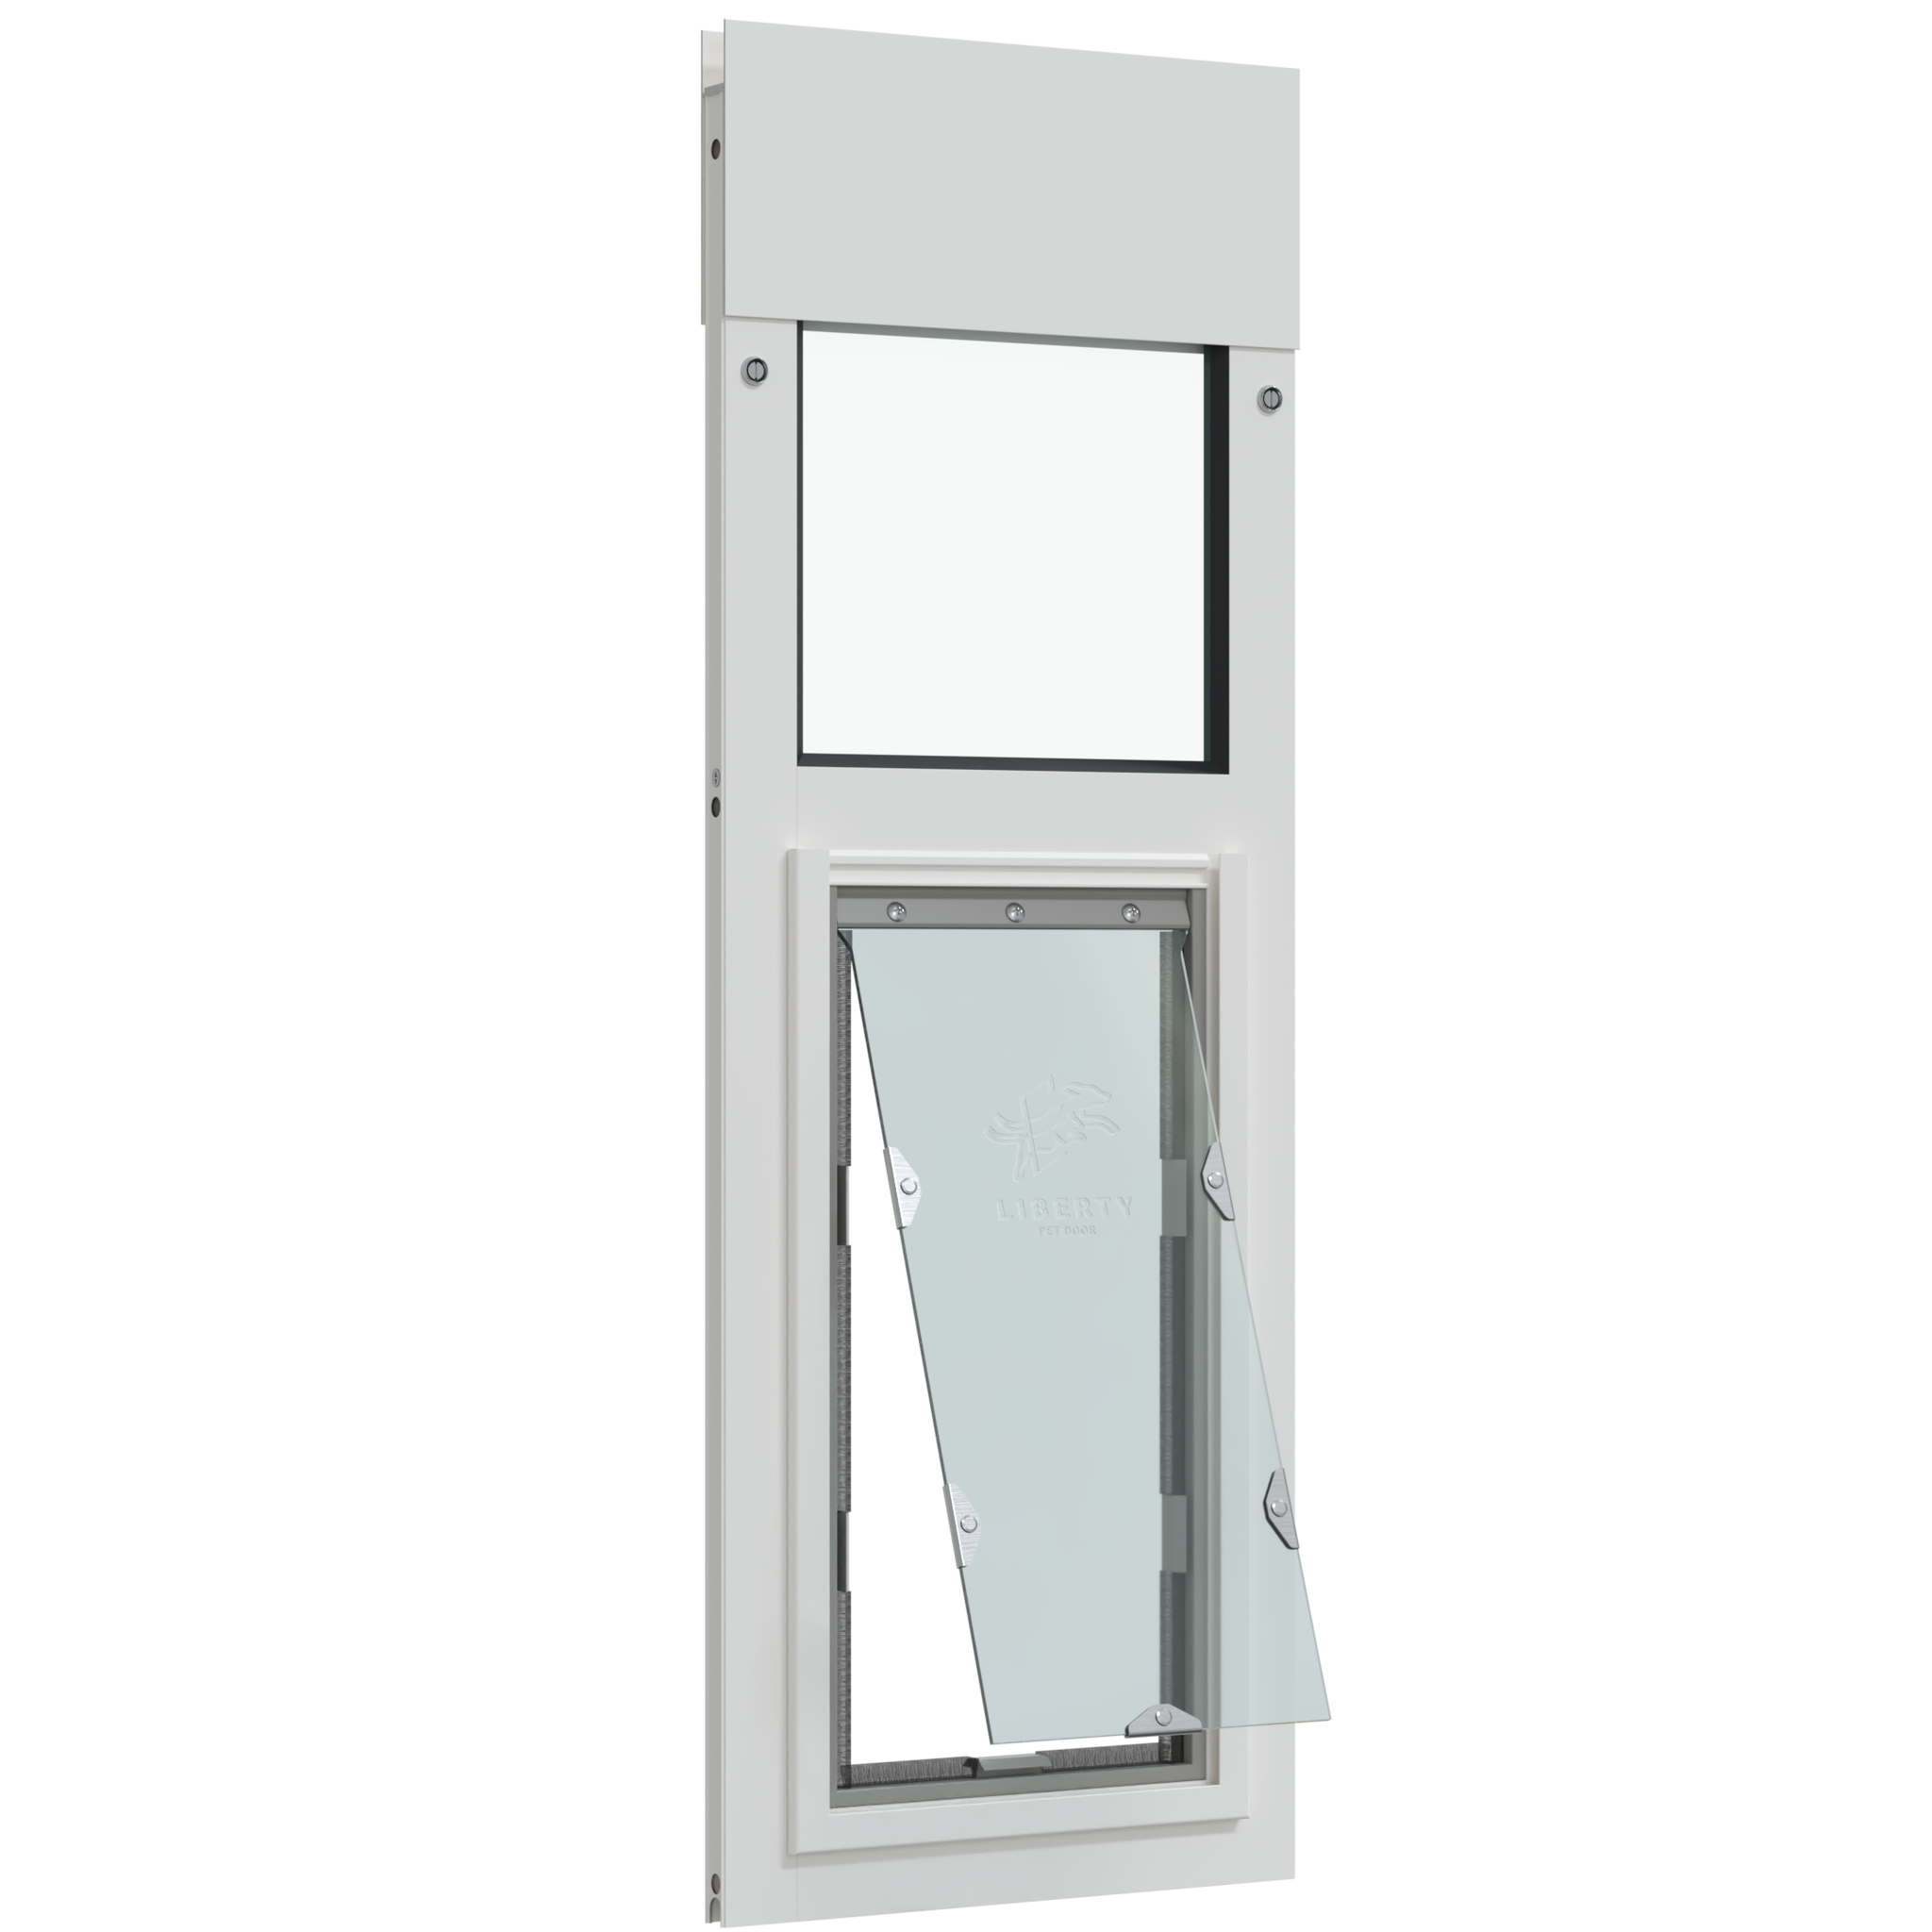
Liberty Cat Door for Horizontal Sliding Windows


- Adjustable Width Range: Fits horizontal sliding windows from 33.5" to 60", accommodating a variety of home styles. Unsure what adjustment range to get? Pick the shorter of the two.
- Climate Control Features: Includes clear safety glass and weather-resistant flaps to maintain comfortable indoor temperatures year-round.
- Installation Convenience: Offers a spring-loaded mechanism for quick setup without permanent modifications, ideal for renters and homeowners.
- Durable Material Options: Available in either robust aluminum or vinyl, each with a sturdy locking cover for enhanced security.
- Customizable Options: Provides both standard and custom sizes, with a selection of frame colors to match your home decor.
 Product Details
Product Details
The Liberty Cat Door for Horizontal Sliding Windows offers an innovative solution for cat owners looking to blend convenience with style. This cat door is meticulously designed to fit horizontal sliding windows from 33.5" to 60" tall, catering to a broad spectrum of house designs and personal aesthetics.
Crafted with attention to detail, the Liberty Cat Door features clear safety glass paired with weather-resistant flaps. This combination not only ensures a clear view outdoors but also maintains a consistent indoor climate, effectively reducing heating and cooling costs. The integration of these materials emphasizes the door's functionality without compromising on energy efficiency.
For homeowners concerned about permanent alterations or those living in rental properties, this cat door is a game-changer. Its installation process is straightforward, thanks to a spring-loaded mechanism that locks into place without the need for drilling or permanent fixtures, making it an excellent choice for temporary setups.
The Liberty Cat Door does not just stand out for its functional benefits; it also offers enhanced security. Each model comes equipped with a sturdy locking cover, ensuring that you can control your cat’s access to the outdoors while preventing unwanted visitors. Additionally, you can choose between durable aluminum and vinyl frame materials, each available in various colors to match your home’s interior.
This product is not only a testament to innovative pet door design but also a reflection of sustainable manufacturing practices. Produced in the USA, the Liberty Cat Door is backed by a three-year warranty, promising long-term satisfaction and reliability.
Features:
- Versatile Installation: Designed to fit a broad range of window widths, making it suitable for nearly any horizontal sliding window.
- Energy Efficiency: Incorporates clear safety glass to reduce energy costs by minimizing heat transfer.
- Non-Permanent Setup: Enables easy installation and removal, perfect for temporary living situations or no-drill policies.
- Secure and Stylish: Comes with a locking cover and is available in multiple frame colors to seamlessly blend with your existing decor.
- Built to Last: Manufactured in the USA with high-quality materials, ensuring durability and reliability with a three-year warranty.


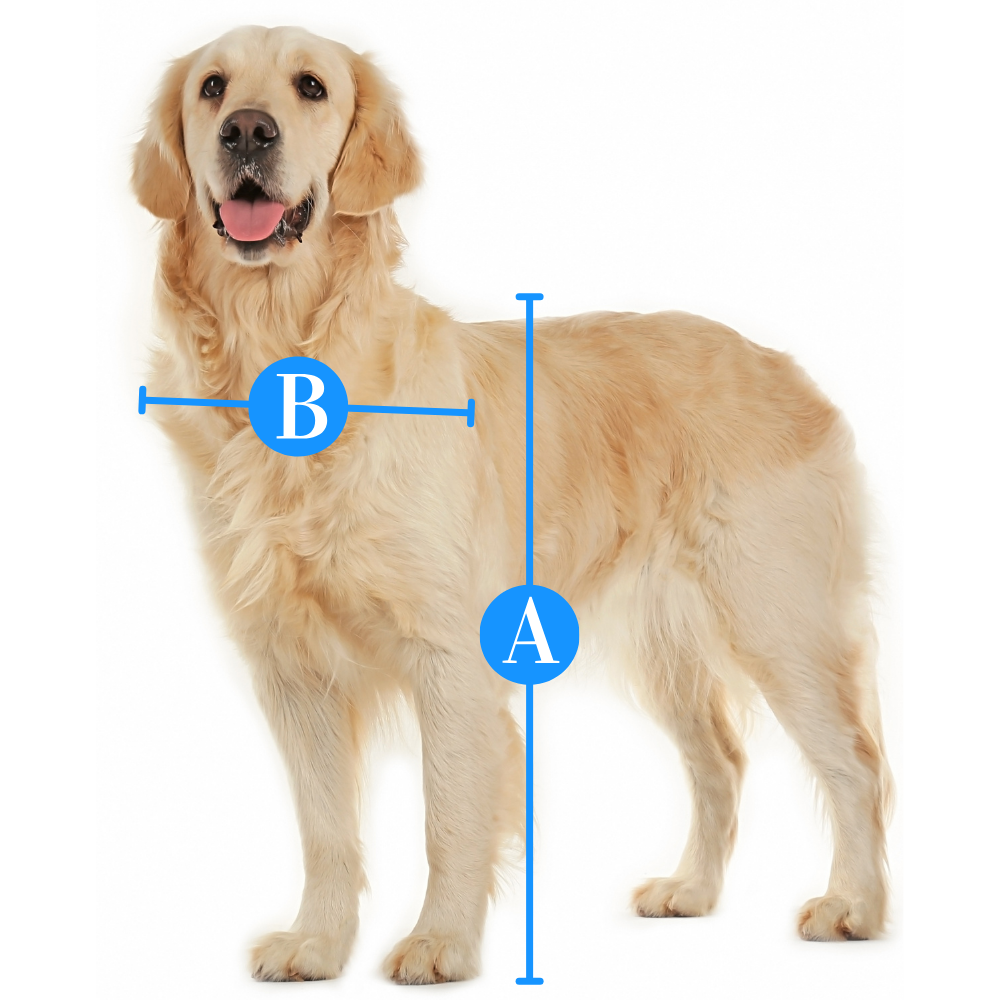
Size Chart
| Flap Size | Flap Dimension | Step Over Range | Overall Panel Width | Recommended Pet Height |
|---|---|---|---|---|
| Small | 7" w x 8" h | 3" - 5" | 10-3/16" | 9" - 13" |
Aluminum panel has 1" framing, measure your track width to make sure that your window will accommodate the panel. Vinyl panels have a 1-1/4" framing.
Track Height Adjustment Range is the measurement of your window height from the lowest point of your track to the highest point.
If your measured track height does not fall within one of the ranges above, we can make a custom height. Custom height option may take up to 4 weeks to special order the glass and build the panel.
Installation Instructions
 Difficulty
Easy
Difficulty
Easy
 Steps
04
Steps
04
 Time Required
0.5 hours
Time Required
0.5 hours
 Sections
02
Sections
02
 Flags
02
Flags
02
Parts
- 1 Horizontal Window Pet Door
- 1 Foam Weather Strip
- 1 Center Post Weather Seal Draft Stopper
- 1 Clamp Lock
- Screwdriver
Tools
- Scissors
- Flathead Screwdriver
Please read instructions & notes thoroughly before installation.
Step 1 Release Spring Mechanism
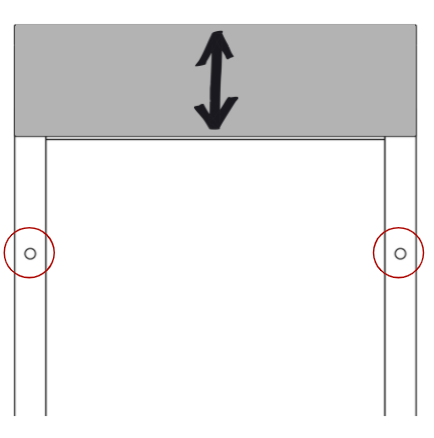
- Loosen the height adjustment locks at the top of the pet panel with the screwdriver. This allows the spring mechanism to move freely up and down.
Step 2 Check Panel Fit

- To insert the panel into the top track, push up against the spring mechanism and swing the bottom of the panel up and over the threshold. Seat the panel on top of the small guide rail in the track.
Step 3 Apply Weather-stripping

- Once you're sure the panel fits, remove it from the frame and lay it on its side on the ground.
- For foam weatherstripping: Peel the backing off the foam weatherstripping. Press it along both edges of the panel, trimming as needed with scissors to ensure a snug fit.
- For rubber weatherstripping: Clean the edge of your sliding door or window with rubbing alcohol to help the weatherstripping stick properly. Starting at the top or bottom, peel and press the strip into place with the folded edge facing indoors—align angled cuts if you have two pieces. For best results, apply the seal to the sliding door or window, but it can go on the pet door panel if needed.
Step 4 Install Center Post Weather Seal


- The center post weather seal strip (draft stopper) should be installed on the inside of the home. It can be installed on either the back edge of the sliding window panel (Figure A) or the leading edge of the stationary panel (Figure B).
- Place the panel back into the window, then tighten the height adjustment locks to lock it in place. Installation complete!
LOCK DETAILS
Since you likely can no longer use your window’s original lock, we have provided you with an alternative locking method to keep your home secure.
Installing the window clamp: This clamp has a screw that tightens by hand to prevent the sliding door from moving beyond the clamp’s placement. For doors manufactured with the glass slider on the inside track, the lock can usually be installed on the door’s raised track.

If you aren’t able to use the lock that comes with the panel: A great alternative to locking your sliding glass door is a Charley bar or dowel in the track. Both work off the same concept - they block the slider from opening. When engaged you cannot pull the sliding door away from the pet door panel.
FAQ
What do I do if I have a window that opens up and down?For windows that open up and down (sash windows), check out the Liberty Pet Door for White Sash Windows. |
Warranty
Warranty Type: Limited.
Duration: 3 years
Coverage: Defects in materials and workmanship under standard regular use.
Exclusions:
Damage caused by misuse or not using the product as intended.
Improper installation.
Damage caused by chewing.
Customer Reviews

Size Chart
| Flap Size | Flap Dimension | Step Over Range | Overall Panel Width | Recommended Pet Height |
|---|---|---|---|---|
| Small | 7" w x 8" h | 3" - 5" | 10-3/16" | 9" - 13" |
Aluminum panel has 1" framing, measure your track width to make sure that your window will accommodate the panel. Vinyl panels have a 1-1/4" framing.
Track Height Adjustment Range is the measurement of your window height from the lowest point of your track to the highest point.
If your measured track height does not fall within one of the ranges above, we can make a custom height. Custom height option may take up to 4 weeks to special order the glass and build the panel.
Difficulty
Easy
Steps
04
Time Required
0.5 hours
Sections
02
Flags
02
Parts
- 1 Horizontal Window Pet Door
- 1 Foam Weather Strip
- 1 Center Post Weather Seal Draft Stopper
- 1 Clamp Lock
- Screwdriver
Tools
- Scissors
- Flathead Screwdriver
Please read instructions & notes thoroughly before installation.
Step 1 Release Spring Mechanism
- Loosen the height adjustment locks at the top of the pet panel with the screwdriver. This allows the spring mechanism to move freely up and down.
Step 2 Check Panel Fit
- To insert the panel into the top track, push up against the spring mechanism and swing the bottom of the panel up and over the threshold. Seat the panel on top of the small guide rail in the track.
Step 3 Apply Weather-stripping
- Once you're sure the panel fits, remove it from the frame and lay it on its side on the ground.
- For foam weatherstripping: Peel the backing off the foam weatherstripping. Press it along both edges of the panel, trimming as needed with scissors to ensure a snug fit.
- For rubber weatherstripping: Clean the edge of your sliding door or window with rubbing alcohol to help the weatherstripping stick properly. Starting at the top or bottom, peel and press the strip into place with the folded edge facing indoors—align angled cuts if you have two pieces. For best results, apply the seal to the sliding door or window, but it can go on the pet door panel if needed.
Step 4 Install Center Post Weather Seal
- The center post weather seal strip (draft stopper) should be installed on the inside of the home. It can be installed on either the back edge of the sliding window panel (Figure A) or the leading edge of the stationary panel (Figure B).
- Place the panel back into the window, then tighten the height adjustment locks to lock it in place. Installation complete!
LOCK DETAILS
Since you likely can no longer use your window’s original lock, we have provided you with an alternative locking method to keep your home secure.
Installing the window clamp: This clamp has a screw that tightens by hand to prevent the sliding door from moving beyond the clamp’s placement. For doors manufactured with the glass slider on the inside track, the lock can usually be installed on the door’s raised track.
If you aren’t able to use the lock that comes with the panel: A great alternative to locking your sliding glass door is a Charley bar or dowel in the track. Both work off the same concept - they block the slider from opening. When engaged you cannot pull the sliding door away from the pet door panel.
FAQ
What do I do if I have a window that opens up and down?For windows that open up and down (sash windows), check out the Liberty Pet Door for White Sash Windows. |
Warranty
Warranty Type: Limited.
Duration: 3 years
Coverage: Defects in materials and workmanship under standard regular use.
Exclusions:
Damage caused by misuse or not using the product as intended.
Improper installation.
Damage caused by chewing.