


Liberty Pet Door Vinyl Patio Panel


- For vinyl sliding glass doors. Fits tracks at least 1-1/2" wide.
- Adjustable height ranges cover most standard slider sizes. Five flap sizes available, from Small to XXL.
- Clear safety glass above the flap keeps the door insulating the way it did before, cutting drafts and heat transfer.
- Clear vinyl flap with magnetic closure and pile weatherstripping. Holds the seal in wind and rain.
- Spring-loaded install. No cutting, no drilling, fully reversible. Common choice for renters and vacation homes.
- Locking cover included; optional C-Clamp Lock available for an extra layer of security.
- Made in the USA with a durable white vinyl frame, backed by a 3-year warranty.
 Product Details
Product Details
The Liberty Pet Door Vinyl Patio Panel installs into a vinyl sliding glass door without cutting or drilling. The spring-loaded panel holds itself in place by compressing between the floor and the top of the door frame. Most installs take a few minutes. The adjustable height range covers most standard slider sizes, and the panel needs a track at least 1-1/2" wide to seat properly.
The panel has clear safety glass above the flap, so the door keeps insulating the way it did before. The clear vinyl flap stays flexible in cold weather and seals tight with magnets along the edges and pile weatherstripping in the frame. It handles wind, rain, and debris.
For security, the panel includes a molded ABS locking cover that slides into place to block the opening. If you want an additional lock, the optional C-Clamp Lock attaches to the slider track and prevents the door from being opened from outside.
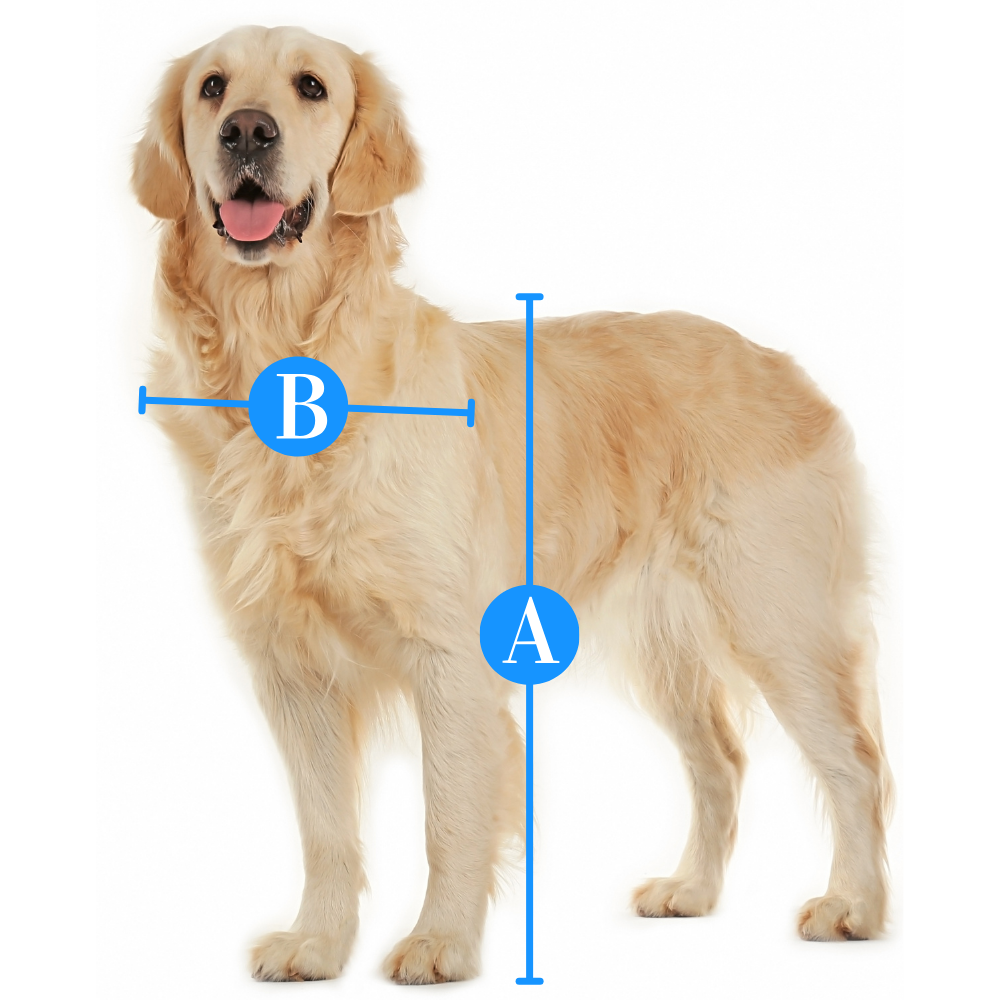
Made in the USA and backed by a 3-year warranty. The white vinyl frame matches most existing vinyl slider doors. Five flap sizes are available (Small, Medium, Large, Extra Large, and XXL), so the same panel design works for households with small cats up through giant breeds.
Size Chart
| Flap Size | Flap Dimension | Step Over Range | Overall Panel Width | Recommended Pet Height |
|---|---|---|---|---|
| Small | 5" w x 12" h | 4" | 10-3/8" | 9" - 16" |
| Medium | 7" w x 16" h | 4" | 12-1/2" | 9" - 22" |
| Large | 9" w x 20" h | 6.6" | 14-1/2" | 9" - 33" |
| Extra Large | 11" w x 24" h | 6.6" | 16-5/8" | 9" - 39" |
| XXL | 13" w x 28" h | 6.6" | 18-3/8" | 9" - 44" |
Track Height Adjustment range is based on the measurement of your sliding door track height from the lowest point of your track to the highest point. Each Liberty Pet Door Panel has a 3" adjustment range. The following standard adjustment ranges are available:
- Short: 74 3⁄4" – 77 3⁄4"
- Regular: 77 1⁄4" – 80 1⁄4"
- Tall: 93 1⁄4" – 96 1⁄4" (additional cost)
If your measured track height does not fall within one of the ranges above, we can make a custom height! Custom height option may take up to 4 weeks to special order the glass and build the panel.
Installation Instructions
One-Piece Panel Installation Instructions
 Difficulty
Easy
Difficulty
Easy
 Steps
08
Steps
08
 Time Required
0.5 hours
Time Required
0.5 hours
 Sections
01
Sections
01
 Flags
01
Flags
01
Parts
- 1 Vinyl Panel Pet Door
- 1 Weatherstrip Seal
- 1 Center Post Weather Seal Draft Stopper
Tools
- Flathead screwdriver
- #2 Philips head screwdriver
- Non-metal hammer
- Scissors
Please read instructions & notes thoroughly before installation. If your panel arrived in two pieces, see our instructions for sectionals.
Step 1 Loosen Height Adjustment Locks

- Loosen the height adjustment locks at the top of the panel. This allows the spring mechanism to move freely up and down.
Step 2 Insert Panel Into Track

- Insert the panel into the upper track of your door frame, push the panel into the spring mechanism, then swing the bottom of the panel up and over the threshold into the lower track rail.
Step 3 Apply Weatherstrip


- Once you're sure the panel fits, remove it from the frame and lay it on its side on the ground.
- For foam weatherstripping: Peel the backing off the foam weatherstripping. Press it along both edges of the panel, trimming as needed with scissors to ensure a snug fit.
- For rubber weatherstripping: Clean the edge of your sliding door or window with rubbing alcohol to help the weatherstripping stick properly. Starting at the top or bottom, peel and press the strip into place with the folded edge facing indoors—align angled cuts if you have two pieces. For best results, apply the seal to the sliding door or window, but it can go on the pet door panel if needed.
Step 4 Place Panel In Track
- Place the panel back into the sliding glass door, then tighten the height adjustment locks to lock it in place.
Step 5 Install the Draft Stopper

- The center post weather seal strip (draft stopper) should be installed on the inside of the home.
- Trim with scissors as needed. Clean the edge of your patio door with rubbing alcohol before installing to assure a good seal.
- Repeat step two to install the panel in your track.
Sectional Panel Installation Instructions
 Difficulty
Easy
Difficulty
Easy
 Steps
08
Steps
08
 Time Required
0.5 hours
Time Required
0.5 hours
 Sections
01
Sections
01
 Flags
01
Flags
01
Parts
- 1 Vinyl Panel Pet Door
- 1 Weatherstrip Seal
- 1 Center Post Weather Seal Draft Stopper
Tools
- Flathead screwdriver
- #2 Philips head screwdriver
- Non-metal hammer
- Scissors
Please read instructions & notes thoroughly before installation. If you need to adjust the step-over height, complete steps A-C before installing the panel in your track.
Step 1 Assemble the Panel


- Align the aluminum connectors extending from the bottom flap panel section with the top glass panel section.
- Press the aluminum connectors into the holes at the bottom of the top glass panel section.
- Ensure locking cover & height adjustment locks are on the same side!
- Fasten the two panels together using the four flathead screws found in the panel packaging.
Step 2 Loosen Height Adjustment Locks
- Loosen the height adjustment locks at the top of the panel. This allows the spring mechanism to move freely up and down.
Step 3 Insert Panel Into Track
- Insert the panel into the upper track of your door frame, push the panel into the spring mechanism, then swing the bottom of the panel up and over the threshold into the lower track rail.
Step 4 Apply Weatherstrip
- Once you're sure the panel fits, remove it from the frame and lay it on its side on the ground.
- For foam weatherstripping: Peel the backing off the foam weatherstripping. Press it along both edges of the panel, trimming as needed with scissors to ensure a snug fit.
- For rubber weatherstripping: Clean the edge of your sliding door or window with rubbing alcohol to help the weatherstripping stick properly. Starting at the top or bottom, peel and press the strip into place with the folded edge facing indoors—align angled cuts if you have two pieces. For best results, apply the seal to the sliding door or window, but it can go on the pet door panel if needed.
Step 5 Place Panel In Track
- Place the panel back into the sliding glass door, then tighten the height adjustment locks to lock it in place.
Step 6 Install the Draft Stopper
- The center post weather seal strip (draft stopper) should be installed on the inside of the home.
- Trim with scissors as needed. Clean the edge of your patio door with rubbing alcohol before installing to assure a good seal.
- Repeat step two to install the panel in your track.
Lock Details

Since you cannot lock your sliding door to your panel pet door, we have provided you with alternative locking methods to secure your home:
Installing the sliding door clamp: This clamp has a screw that tightens by hand to prevent the sliding door from moving beyond the clamp’s placement. For doors manufactured with the glass slider on the inside track, the lock can usually be installed on the door’s raised track.
If you aren’t able to use the lock that comes with the panel: A great alternative to locking your sliding glass door is a Charley bar or dowel in the track. Both work off the same concept – they block the slider from opening. When engaged you cannot pull the sliding door away from the pet door panel.

Other Installation Options
Semi-Permanent Installation:
You might choose to secure the panel in your track with screws. This can be done by drilling screws at an angle in the top and bottom tracks. We recommend doing this from the outside to minimize damage to the sliding glass door frame. One-way screws will prevent tampering or removal of the panel from the outside.

Stationary Panel:
Some stationary sliding door panels can be unfastened and moved over to one side so that you can install the pet door panel between the jamb and stationary panel.
Avoid damaging your sliding glass door by checking that your door can move and that you can reinstall it properly before trying to uninstall the unit.
You will still lose space in your slider to move through, however, you will be able to use your existing sliding door lock to secure your home. Installing your pet door this way is also great in that you already have an alarm system in place.
If your sliding glass door slides on the outside track, using an alternative lock might not be possible, so this allows you to still lock your door.
NOTE: You can do the stationary panel install with the regular spring actuator method – no need to screw it in.
Warranty
Warranty Type: Limited.
Duration: 3 years
Coverage: Defects in materials and workmanship under standard regular use.
Exclusions:
Damage caused by misuse or not using the product as intended.
Improper installation.
Damage caused by chewing.
Customer Reviews
Size Chart
| Flap Size | Flap Dimension | Step Over Range | Overall Panel Width | Recommended Pet Height |
|---|---|---|---|---|
| Small | 5" w x 12" h | 4" | 10-3/8" | 9" - 16" |
| Medium | 7" w x 16" h | 4" | 12-1/2" | 9" - 22" |
| Large | 9" w x 20" h | 6.6" | 14-1/2" | 9" - 33" |
| Extra Large | 11" w x 24" h | 6.6" | 16-5/8" | 9" - 39" |
| XXL | 13" w x 28" h | 6.6" | 18-3/8" | 9" - 44" |
Track Height Adjustment range is based on the measurement of your sliding door track height from the lowest point of your track to the highest point. Each Liberty Pet Door Panel has a 3" adjustment range. The following standard adjustment ranges are available:
- Short: 74 3⁄4" – 77 3⁄4"
- Regular: 77 1⁄4" – 80 1⁄4"
- Tall: 93 1⁄4" – 96 1⁄4" (additional cost)
If your measured track height does not fall within one of the ranges above, we can make a custom height! Custom height option may take up to 4 weeks to special order the glass and build the panel.
One-Piece Panel Installation Instructions
Difficulty
Easy
Steps
08
Time Required
0.5 hours
Sections
01
Flags
01
Parts
- 1 Vinyl Panel Pet Door
- 1 Weatherstrip Seal
- 1 Center Post Weather Seal Draft Stopper
Tools
- Flathead screwdriver
- #2 Philips head screwdriver
- Non-metal hammer
- Scissors
Please read instructions & notes thoroughly before installation. If your panel arrived in two pieces, see our instructions for sectionals.
Step 1 Loosen Height Adjustment Locks
- Loosen the height adjustment locks at the top of the panel. This allows the spring mechanism to move freely up and down.
Step 2 Insert Panel Into Track
- Insert the panel into the upper track of your door frame, push the panel into the spring mechanism, then swing the bottom of the panel up and over the threshold into the lower track rail.
Step 3 Apply Weatherstrip
- Once you're sure the panel fits, remove it from the frame and lay it on its side on the ground.
- For foam weatherstripping: Peel the backing off the foam weatherstripping. Press it along both edges of the panel, trimming as needed with scissors to ensure a snug fit.
- For rubber weatherstripping: Clean the edge of your sliding door or window with rubbing alcohol to help the weatherstripping stick properly. Starting at the top or bottom, peel and press the strip into place with the folded edge facing indoors—align angled cuts if you have two pieces. For best results, apply the seal to the sliding door or window, but it can go on the pet door panel if needed.
Step 4 Place Panel In Track
- Place the panel back into the sliding glass door, then tighten the height adjustment locks to lock it in place.
Step 5 Install the Draft Stopper
- The center post weather seal strip (draft stopper) should be installed on the inside of the home.
- Trim with scissors as needed. Clean the edge of your patio door with rubbing alcohol before installing to assure a good seal.
- Repeat step two to install the panel in your track.
Sectional Panel Installation Instructions
Difficulty
Easy
Steps
08
Time Required
0.5 hours
Sections
01
Flags
01
Parts
- 1 Vinyl Panel Pet Door
- 1 Weatherstrip Seal
- 1 Center Post Weather Seal Draft Stopper
Tools
- Flathead screwdriver
- #2 Philips head screwdriver
- Non-metal hammer
- Scissors
Please read instructions & notes thoroughly before installation. If you need to adjust the step-over height, complete steps A-C before installing the panel in your track.
Step 1 Assemble the Panel
- Align the aluminum connectors extending from the bottom flap panel section with the top glass panel section.
- Press the aluminum connectors into the holes at the bottom of the top glass panel section.
- Ensure locking cover & height adjustment locks are on the same side!
- Fasten the two panels together using the four flathead screws found in the panel packaging.
Step 2 Loosen Height Adjustment Locks
- Loosen the height adjustment locks at the top of the panel. This allows the spring mechanism to move freely up and down.
Step 3 Insert Panel Into Track
- Insert the panel into the upper track of your door frame, push the panel into the spring mechanism, then swing the bottom of the panel up and over the threshold into the lower track rail.
Step 4 Apply Weatherstrip
- Once you're sure the panel fits, remove it from the frame and lay it on its side on the ground.
- For foam weatherstripping: Peel the backing off the foam weatherstripping. Press it along both edges of the panel, trimming as needed with scissors to ensure a snug fit.
- For rubber weatherstripping: Clean the edge of your sliding door or window with rubbing alcohol to help the weatherstripping stick properly. Starting at the top or bottom, peel and press the strip into place with the folded edge facing indoors—align angled cuts if you have two pieces. For best results, apply the seal to the sliding door or window, but it can go on the pet door panel if needed.
Step 5 Place Panel In Track
- Place the panel back into the sliding glass door, then tighten the height adjustment locks to lock it in place.
Step 6 Install the Draft Stopper
- The center post weather seal strip (draft stopper) should be installed on the inside of the home.
- Trim with scissors as needed. Clean the edge of your patio door with rubbing alcohol before installing to assure a good seal.
- Repeat step two to install the panel in your track.
Lock Details
Since you cannot lock your sliding door to your panel pet door, we have provided you with alternative locking methods to secure your home:
Installing the sliding door clamp: This clamp has a screw that tightens by hand to prevent the sliding door from moving beyond the clamp’s placement. For doors manufactured with the glass slider on the inside track, the lock can usually be installed on the door’s raised track.
If you aren’t able to use the lock that comes with the panel: A great alternative to locking your sliding glass door is a Charley bar or dowel in the track. Both work off the same concept – they block the slider from opening. When engaged you cannot pull the sliding door away from the pet door panel.
Other Installation Options
Semi-Permanent Installation:
You might choose to secure the panel in your track with screws. This can be done by drilling screws at an angle in the top and bottom tracks. We recommend doing this from the outside to minimize damage to the sliding glass door frame. One-way screws will prevent tampering or removal of the panel from the outside.
Stationary Panel:
Some stationary sliding door panels can be unfastened and moved over to one side so that you can install the pet door panel between the jamb and stationary panel.
Avoid damaging your sliding glass door by checking that your door can move and that you can reinstall it properly before trying to uninstall the unit.
You will still lose space in your slider to move through, however, you will be able to use your existing sliding door lock to secure your home. Installing your pet door this way is also great in that you already have an alarm system in place.
If your sliding glass door slides on the outside track, using an alternative lock might not be possible, so this allows you to still lock your door.
NOTE: You can do the stationary panel install with the regular spring actuator method – no need to screw it in.
Warranty
Warranty Type: Limited.
Duration: 3 years
Coverage: Defects in materials and workmanship under standard regular use.
Exclusions:
Damage caused by misuse or not using the product as intended.
Improper installation.
Damage caused by chewing.